Your first release on Google Play
Overview
- Setup steps must be complete: create Google Play app store listing, setup device builds and keystore file (we usually do this for you).
- Visit the Build and Preview tab in the app customizer, run the "Submit to Google Play" build.
- Download the .aab file that is emailed to you, and manually upload to your Play Store production release. Only the first release needs to be uploaded manually, subsequent releases can be automated.
You've finished building your app and now you want to get it live on Google Play. This doc will run through the steps to get from your app in MyAppPresser to live on Google Play. Please note that if you already have an existing live app on Google Play that you're updating then this process would be slightly different and you can skip over some of these steps.
Video
This video covers creating your listing and uploading your first release. Please continue reading below for more details.
Keystore and Google Play Services API Key
In order to produce an APK file for the Play Store, we need to sign it with a Keystore file. The Keystore file is a certificate that is used to prove that the APK being submitted belongs to you and prevents 3rd parties from submitting an app update to the Play Store even if your Google Play account is compromised.
We also use a Google Play Services API Key to allow our build server to automatically send future builds to the Play Store on your behalf. This file isn't needed for this first submission but makes app updates a super simple 1 click operation. You can create that file by following our docs here: https://docs.apppresser.com/article/604-google-play-services-api-key
If you're a business customer, we handle all of the certs for you and you can request a set of certs for your app here. Note, you will need to create the Google Play Services API Key above yourself and submit it with that form.
If you're an agency or reseller customer you can create your keystore file by following our docs to create the file, then add it to Bitrise:
- https://docs.apppresser.com/article/350-android-release-signing
- https://docs.apppresser.com/article/629-bitrise-workflow-self-setup
Generating your APK
Now that your app is setup and ready with the required certificates we can run a "Submit to Google Play" build from the Build and Preview tab within MyAppPresser. Assuming this is your first release to Google Play, after roughly 10 minutes you'll receive an email with a link to download your signed APK file. Once your app is live on the app store this build will automatically publish your new version.

Creating your Google Play Listing
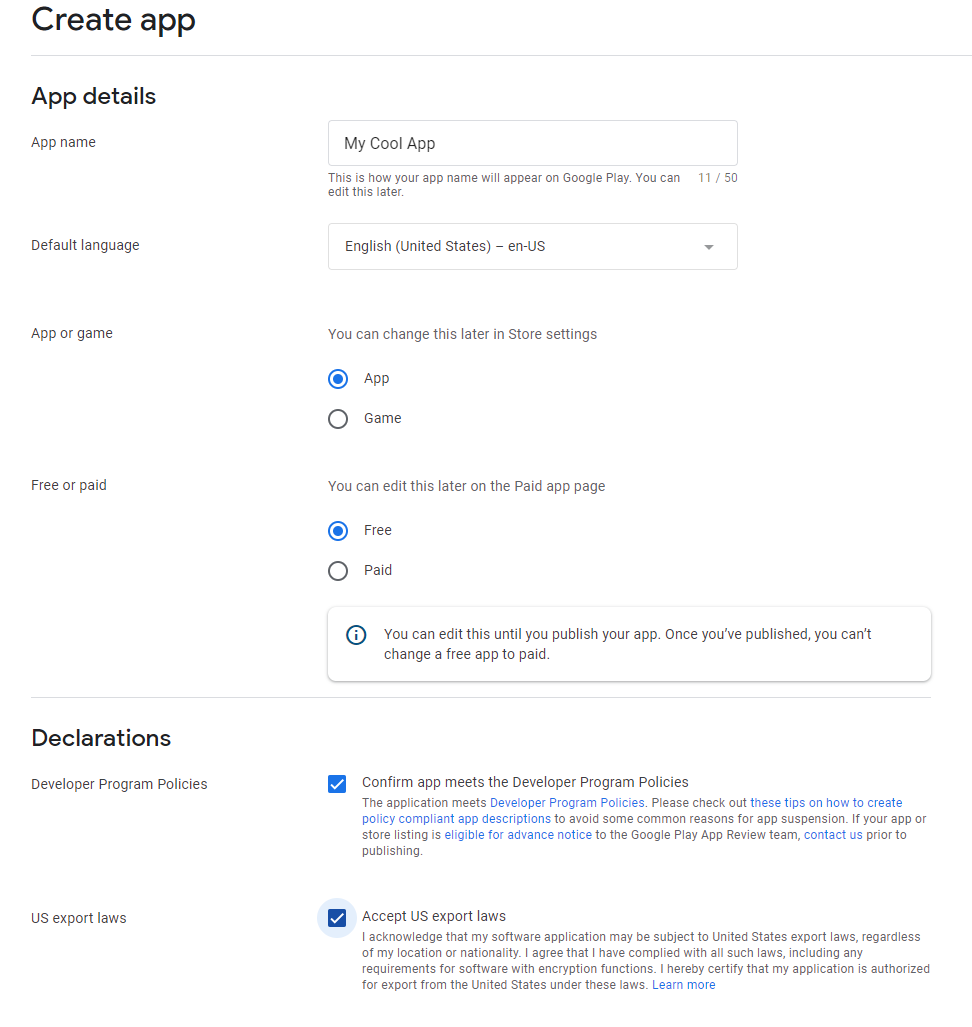
Now you have your signed APK file and it's time to create your app on the Play Store. Head to https://play.google.com/console/, click Create App and follow the prompts to enter in some basic info about your Application
Next, we need to provide more information to Google Play about our app by completing all of the "First Steps" tasks at the top of the Dashboard:
 As you complete each of these items they will be checked off and once all are complete this dialog box will disappear and you're ready to move on.
Submitting your APK
In the console menu, select Releases => Overview.
Start on the Countries/Regions tab and select which countries you want to be able to download your app. If you're happy with it being available globally you can select all.

Head to Release -> Production in the left menu.

Next, click Create New Release. Click the Blue Continue button to agree to allow Google to protect your signing key:

Next, take the signed APK you downloaded from the build email and upload that here. It will create the Release name based on the information from the APK which is based on the information from the Settings screen in MyAppPresser. You can fill in any release notes you'd like to include and them in the field

Save the changes and then click Review Release. If everything looks in order and you're ready to publish the app go ahead and click the Start Rollout to Production button

Congratulations, your app is now live on the Google Play store!